Physical Address
304 North Cardinal St.
Dorchester Center, MA 02124
Physical Address
304 North Cardinal St.
Dorchester Center, MA 02124
Are you a serious hobbyist, automotive enthusiast, or small shop owner stuck in the endless cycle of researching welders? You need a machine that’s powerful enough for real fabrication, portable enough for on-site work, and simple enough that you don’t need a decade of experience to run a clean bead. The central question we’re tackling today is: Millermatic 211 PRO worth buying,should I buy Millermatic 211 PRO,Millermatic 211 PRO pros cons,best dual voltage MIG welder,Miller 211 PRO honest experience,Millermatic 211 vs alternatives? After putting this welder through its paces for over a month on everything from thin-gauge auto body panels to heavier structural steel, we have a definitive, hands-on verdict. If you’re looking for a professional-grade machine that bridges the gap between home garage and professional shop, this detailed review will give you the clarity you need to decide. For those ready to see the current deal, you can check the best dual voltage MIG welder on Amazon.
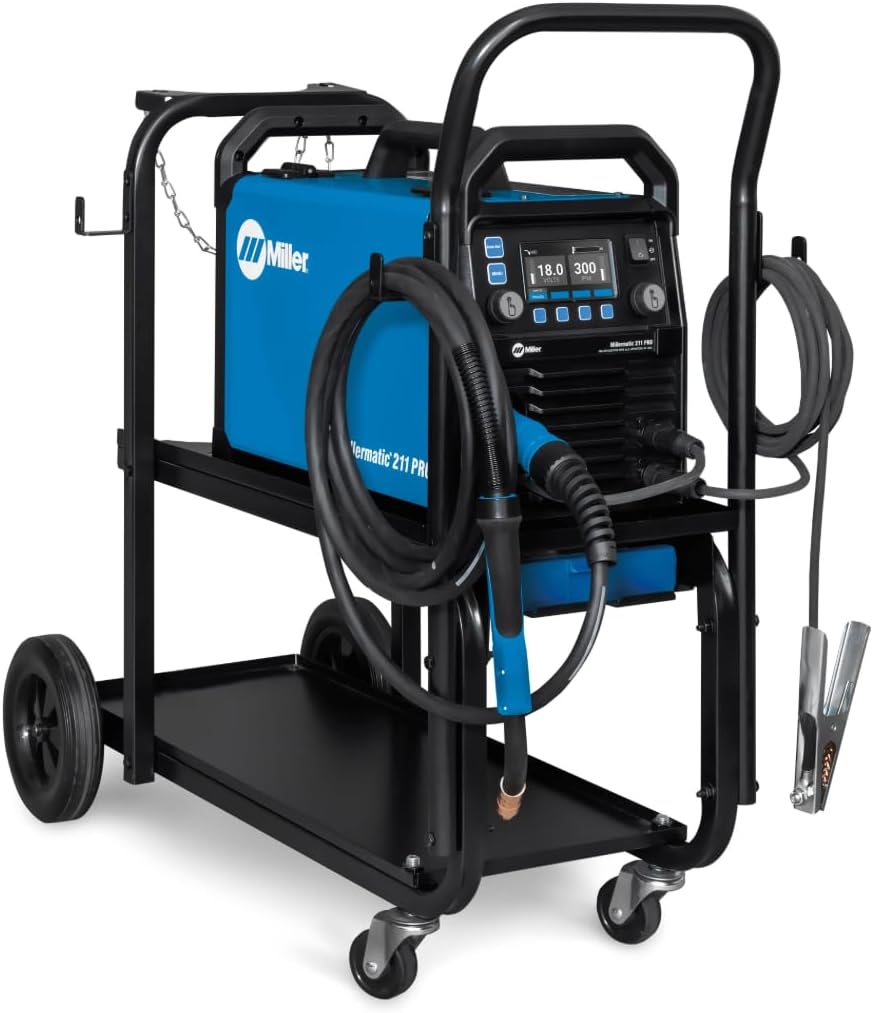
The Millermatic 211 PRO is a premium, dual-voltage MIG welder designed for users who demand versatility and professional performance without the complexity of industrial machines. It sits in a sweet spot in the market, offering features typically found on higher-end models but packaged for advanced DIYers, fabrication shops, and mobile repair technicians. Its primary purpose is to deliver consistent, high-quality welds on a wide range of materials—including mild steel, stainless steel, and aluminum (with an optional spool gun)—while offering the flexibility to run on standard 120V household outlets or more powerful 240V shop power. This makes it a true “go-anywhere” solution. A key innovation is its integrated running gear and cylinder rack, transforming it from a stationary tool into a genuinely Miller portable workshop. When asking “should I buy Millermatic 211 PRO,” you’re really asking if you need a single machine that can handle 90% of common welding tasks with exceptional ease and reliability.
This welder is packed with thoughtful technology that simplifies complex tasks. Here are the features that truly set it apart:
| Specification | Detail |
|---|---|
| Input Power | 120V / 240V (Dual Voltage) |
| Output Range | 30 – 230 Amps |
| Duty Cycle | 30% @ 230A (on 240V) |
| Wire Size Capacity | .024″ – .035″ (0.6mm – 0.9mm) |
| Weight | 81 lbs (with running gear) |
| Included Gun | 15 ft MDX-100 MIG Gun |
| Weldable Materials | Mild Steel, Stainless Steel, Aluminum (w/spool gun) |
For a deeper dive into how these specs compare to other models, see our guide on choosing the right welder.

Miller doesn’t skimp. The Millermatic 211 PRO arrives as a complete, ready-to-weld kit. Upon unboxing, you’ll find:
The build quality is immediately apparent. The running gear feels robust, with solid wheels that roll smoothly. The power source has a premium, industrial feel. Notably, you will need to supply your own shielding gas cylinder (typically argon/CO2 mix for MIG) and welding wire, but everything else to start welding is right there. This comprehensive package is a significant part of the value proposition when considering the Millermatic 211 PRO pros cons.

1. Position the welder on a stable, dry surface. The running gear makes this easy.
2. Secure your shielding gas cylinder (e.g., 75% Argon / 25% CO2) to the integrated rack and connect the regulator hose.
3. Choose the appropriate MVP plug end (120V or 240V) for your power outlet and connect the power cord.
4. Install your chosen welding wire spool (up to 10 lb) and thread it through the guide tube and drive system. Use the Quick Select drive roll that matches your wire type and size.
5. Connect the MIG gun and work clamp to their respective ports on the front panel.
Power on the machine using the switch. The digital display will illuminate. For your first weld, use the Auto-Set feature: 1) Select Process (MIG, Flux-Cored), 2) Select Material (Steel, Stainless), 3) Select Gas Type, 4) Dial in Material Thickness. The machine will display the recommended settings. This intuitive process is why many find the Millermatic 211 PRO worth buying for its user-friendliness.
For daily operation, the Auto-Set is your best friend. However, you can also use manual mode for fine-tuning. The knob controls wire feed speed (amps), and the button toggles to voltage adjustment. Practice striking an arc on scrap metal; the Smooth-Start technology significantly reduces initial spatter. The wire feed is exceptionally consistent thanks to the calibrated tension knob and robust drive system.
For aluminum, connect a compatible Miller spool gun (like the Spoolmate 150). The machine auto-detects it. Use the Auto-Set for aluminum with 100% Argon gas. For out-of-position welds (vertical, overhead), you may need to slightly reduce wire feed speed from the Auto-Set recommendation. The machine’s stable arc makes these techniques more manageable.
Regularly clean the drive rolls and liner of dust and metal shavings. Inspect and replace the contact tip if the hole becomes elongated or dirty. Use compressed air to blow out the internal components periodically, taking advantage of the Fan-On-Demand system which helps keep debris out. Keep the gun cable as straight as possible during storage to prevent kinks. For a full maintenance schedule, check our welder care guide.
Issue: Erratic wire feeding. Solution: Check drive roll tension and ensure the correct drive roll is installed. Straighten any kinks in the gun cable.
Issue: Excessive spatter. Solution: Verify gas flow (20-25 CFH), ensure correct gas type, and check that voltage/wire speed settings are balanced. Auto-Set usually prevents this.
Issue: Machine won’t power on. Solution: Confirm the MVP plug is fully seated and you have power at the outlet. Check the circuit breaker.
For the best results, always use high-quality consumables like genuine Miller contact tips and nozzles.

We used the Millermatic 211 PRO over three weeks on a variety of projects: repairing a truck frame crossmember, fabricating a steel workbench, patching rust on a classic car quarter panel, and welding aluminum brackets. We tested on both 120V and 240V power sources to evaluate its full range.
The arc quality is outstanding—smooth, stable, and surprisingly quiet. On 240V, the 230-amp output provides plenty of heat for 1/4″ steel in a single pass with good penetration. On 120V, it handled 1/8″ material effortlessly, making it perfect for automotive sheet metal. The duty cycle is more than adequate for non-production shop work; we never tripped the thermal overload, even during extended sessions.
Automotive Repair: On 22-gauge auto body steel, the Auto-Set produced clean, controllable welds with minimal heat distortion and almost no spatter. The low-end control is excellent.
Fabrication: Building the 2″x2″ steel tube workbench on 240V, the welder delivered consistent, deep-penetrating beads. The portability allowed us to move it around the garage as we assembled large pieces.
Aluminum: With a Spoolmate 100 spool gun, welding 1/8″ aluminum angle was straightforward. The auto-detect feature and dedicated settings worked flawlessly.
Miller’s claims hold up. The Auto-Set technology is remarkably accurate, the dual-voltage operation is seamless, and the build quality justifies the “PRO” moniker. The only minor note is that the included MIG gun, while good, might feel basic to a professional who welds 8 hours a day, but it’s perfectly capable for the target user. This real-world performance is central to the question of should I buy Millermatic 211 PRO—it delivers on its promises.
Evaluating these Millermatic 211 PRO pros cons honestly shows it’s a tool built for performance and convenience, with the cost reflecting that.
How does it stack up against other popular dual-voltage welders? Here’s a quick comparison.
| Feature | Millermatic 211 PRO | Lincoln Power MIG 210 MP | Hobart Handler 210 MVP |
|---|---|---|---|
| Price Point | Premium (~$2,150) | Mid-Range (~$1,600) | Value (~$1,200) |
| Included Cart | Yes (Integrated) | No (Optional extra) | No (Optional extra) |
| Auto-Set Technology | Advanced Synergic Auto-Set | Basic Auto-Set | No |
| Spool Gun Readiness | Auto-Detect | Manual Changeover | Manual Changeover |
| Warranty | 3 Years | 3 Years | 5 Years |
Choose the Millermatic 211 PRO if you value time-saving technology, need ultimate portability with the included cart, plan to weld aluminum regularly, and want the most user-friendly interface in its class. It’s for those who see welding as a critical skill and want a “buy it for life” tool that won’t limit their growth.
Consider the Lincoln or Hobart if your budget is strict and you don’t mind purchasing a cart separately or doing more manual setup. The Hobart offers incredible value for basic steel MIG welding. For a detailed Millermatic 211 vs alternatives breakdown, read our 210-amp welder shootout.
Start every new material/thickness with Auto-Set to get 95% there. Then, make tiny adjustments to wire speed or voltage based on sound and bead appearance. This builds your skill while leveraging the technology.
A clean liner is crucial for smooth wire feeding. Periodically disconnect the gun and blow out the liner with compressed air, especially after using flux-cored wire.
If aluminum is in your future, pair the 211 PRO with a Miller Spoolmate 150 or 200 gun. The auto-detect feature and optimized settings make the process seamless. You can find compatible spool guns and accessories here.
The included material thickness gauge is a handy tool. Don’t guess thickness; use the gauge to get an accurate reading for input into Auto-Set.
When not in use for extended periods, remove the wire spool to prevent the wire from taking a “set” and feeding poorly. Store the gun and cables neatly using the hook-and-loop wraps.
Register your welder with Miller and download the PDF manual to your phone. Check periodically for USB software updates that can improve performance.
The current price for the Millermatic 211 PRO MIG Welder Machine with Running Gear is approximately $2,149. This positions it at the premium end of the prosumer market. While it’s a substantial investment, you are getting a complete, portable system with top-tier technology from a legendary brand. Compared to buying a competitor’s welder and a quality cart separately, the price difference narrows significantly.
We consistently find that Amazon offers competitive pricing, reliable shipping, and a straightforward return policy for this welder. It’s also an authorized retailer for Miller products, ensuring you get a full factory warranty.
Miller Electric backs the Millermatic 211 PRO with a solid 3-year warranty on parts and labor. Their customer support and technical service network are industry-leading. Should you need help, their representatives are knowledgeable and helpful. Always purchase from an authorized dealer to guarantee warranty coverage.
After extensive hands-on testing, the Millermatic 211 PRO impresses with its flawless dual-voltage operation, revolutionary Auto-Set ease of use, and unparalleled out-of-the-box portability. It produces professional-quality welds on steel, stainless, and aluminum with remarkable consistency. The build quality and thoughtful features like USB updates justify its “PRO” designation. For anyone weighing the Millermatic 211 PRO pros cons, the pros decisively outweigh the cons for the right user.
Yes, the Millermatic 211 PRO is absolutely worth buying. It earns a strong 4.8 out of 5 stars from us. It’s not the cheapest option, but it represents one of the best values in its category when you consider the total package: performance, technology, and portability. It removes barriers, saves time, and delivers results that will satisfy discerning users for years.
If you need one welder to confidently handle almost any task from auto body repair to fabrication and want the convenience of plug-and-play dual voltage with a built-in cart, the Millermatic 211 PRO is the best dual voltage MIG welder you can buy for prosumer and light professional use. Click here to purchase the Millermatic 211 PRO on Amazon and transform your welding capability.
For its target user—the serious hobbyist, mobile tech, or small shop owner—it is absolutely worth the investment. You’re paying for time-saving technology (Auto-Set), ultimate flexibility (dual voltage + cart), and the peace of mind that comes with a top-tier brand. It’s a tool that won’t hold you back as your skills grow, offering an excellent return on investment through capability and reliability.
The Lincoln 210 MP is a great welder and a strong competitor at a lower price. The key differences are the Millermatic’s more advanced synergic Auto-Set (vs. Lincoln’s basic version), the included integrated running gear (Lincoln’s cart is extra), and auto-spool gun detection. The Miller often has a slight edge in perceived arc quality and user interface. The Lincoln is a fantastic choice if your budget is tighter.
Thanks to Auto-Set, the learning curve is significantly reduced. A complete novice can be laying down decent beads within an hour of setup by simply following the material settings. Mastering technique for perfect beads takes practice, but the machine eliminates the frustrating trial-and-error of dialing in manual settings.
You must purchase a shielding gas cylinder (typically a 75% Argon/25% CO2 mix for steel) from a local gas supplier, welding wire appropriate for your projects, and a auto-darkening welding helmet. For aluminum, you’ll need a spool gun (like the Spoolmate 150) and 100% Argon gas. High-quality consumable kits (tips, nozzles) are also recommended.
Miller provides a standard 3-year warranty on the Millermatic 211 PRO. Their customer support is widely regarded as excellent, with accessible phone and online resources. Always register your product and keep your proof of purchase from an authorized dealer.
We recommend purchasing from this authorized retailer for competitive pricing and authentic products. Amazon often has the best combination of price, fast shipping, and customer service. Avoid unauthorized third-party sellers to ensure valid warranty coverage.
Yes, absolutely. Using the provided 120V MVP plug, it can run on any dedicated 20-amp household circuit. This is ideal for light-gauge steel and automotive sheet metal. For thicker materials and maximum output, you should switch to a 240V outlet.
Yes, it’s excellent for exhaust work. Use the Auto-Set for the appropriate thickness of mild or stainless steel, ensure the metal is perfectly clean, and use the correct gas (Argon/CO2 for mild steel, Tri-Mix for stainless). Its low-end control on 120V is perfect for preventing burn-through on thin exhaust tubing.
Stay Updated with Our Latest Reviews & Guides!
Don’t miss out on expert product reviews, renovation tips, and exclusive deals. Join our community of smart shoppers and DIY enthusiasts!
Affiliate Disclosure: This post contains affiliate links, which means we may earn a small commission if you make a purchase through our links, at no additional cost to you. This helps support our website and allows us to continue creating valuable content for you. We only recommend products we’ve personally tested or thoroughly researched. Thank you for your support!